Custom input types - intro
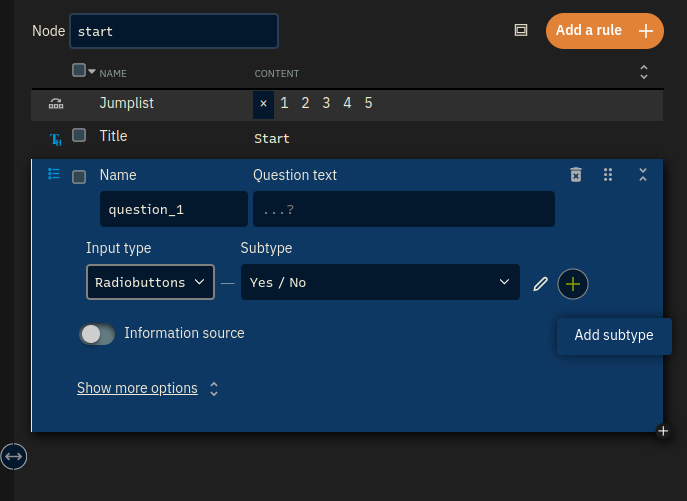
xxllnc Expertsystemen has some pre-defined input subtypes, such as the Yes/No radio group or the Number input, Precision 2. However, at some point you will want to use your own questions. To do so, you need to define your own types.
To create your own input type, you will first need to decide how the user can answer. For example, will the user answer in a drop-down menu? A radio group? Second, you need to create your own type. In the following section we will give an example of creating a type.
Example
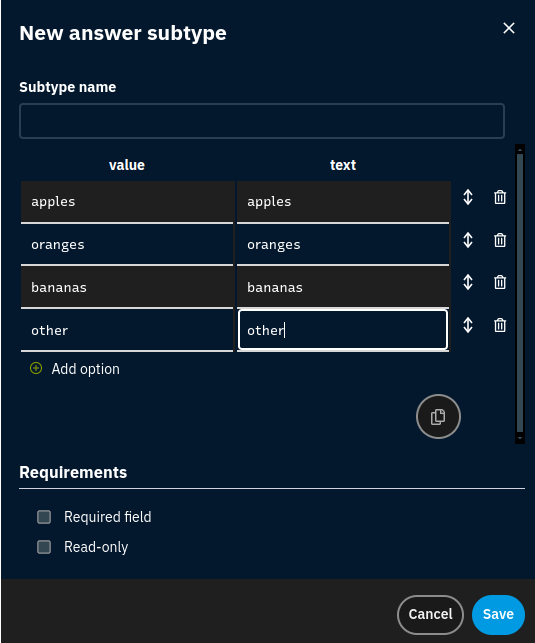
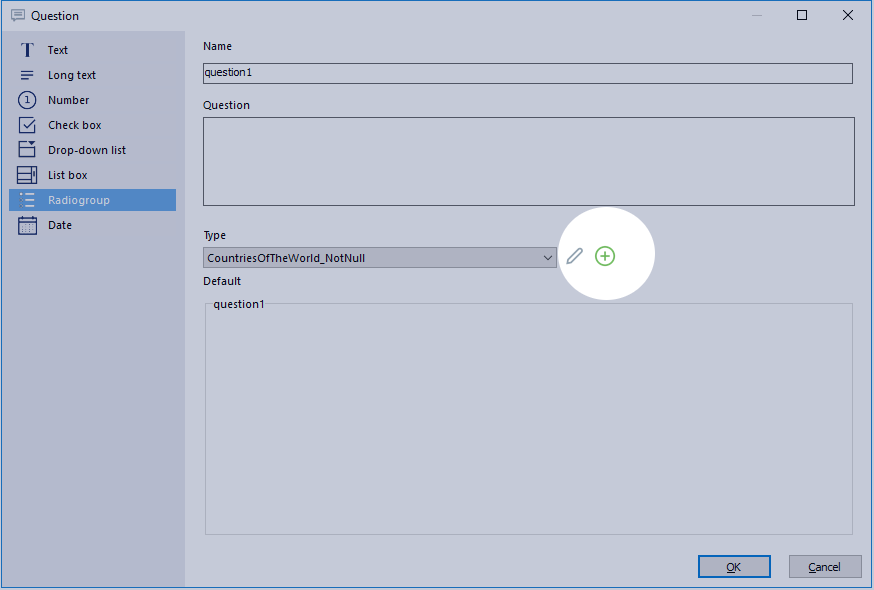
Let’s imagine you want to know what brand of car the user owns. You are only interested in three well-known brands, and the others don’t really matter. Therefore, a radio group with the options Audi, Mercedes, Volkswagen and Other will do. To make them, add a question (Actions > Question). In the question screen, select Radio group and click the ![]() .
.
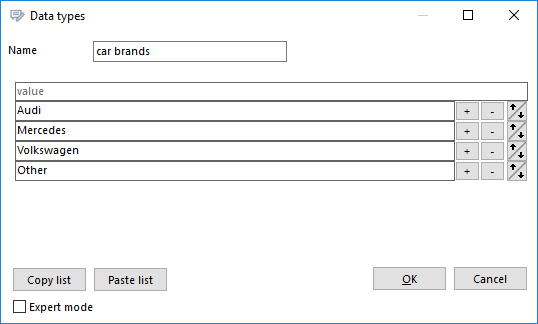
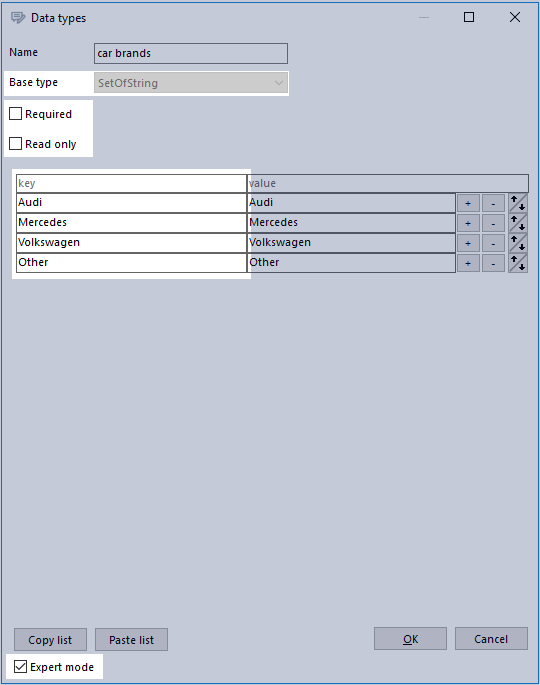
Doing so will open the Data Types dialog. It will automatically create a new input type for you. The first thing you should do is give it a logical name. In this case, consider ‘car brands’ or something related. You can later reuse this data type, which is why you have to name it. Next, enter all options the user can enter in a separate field. You can add a field by pressing [Enter] or using the buttons to the right of the field. Your screen should now look like this:
If you press [OK] and run your model (click ![]() or press
or press [F9]) you can see your newly created input type in action!
If at any point you want to edit your input type, you can select the edit button ![]() next to the add
next to the add ![]() button and the edit screen will reappear.
button and the edit screen will reappear.
Expert mode
For some questions, you might need some more options. In that case you can check the Expert mode box in the bottom left of the screen. This will show more options than the normal input type screen.
- Required
- will make the question required. That means a user can’t go to the next screen unless the question is answered.
- Read only
- will not allow the user to answer the question: it will be readable but not editable.
- Base type
- is the input type your own type is based on. For example, you can change this to a time or date. This is only possible when you create the input type for the first time, not while editing one (see advanced custom input types).
You might wonder why there are two columns: one labeled ‘key’ and the other ‘value’.
This design allows you to use values that differ from the actual text the user sees. Essentially, the user sees the text while the system uses the value. This can be particularly useful in certain scenarios. For instance, imagine we want to assign a score to someone’s car brand, with that score determining the next step. By giving each car brand a numerical value, we can set conditions to check if the score is high enough to proceed to the next node.
Be aware that changing the key value can cause quite some confusion! This is especially important when you are not the only editor of the model.