Libraries
Libraries allow you to reuse models or parts of models across multiple projects, reducing errors, improving maintenance, and providing a clearer overview. Key benefits include:
- Reusability: Save time by avoiding repetitive work. Once a library is created, it can be used in multiple models with just a few clicks.
- Consistency: Changes made to a library automatically update in all models that use it, ensuring uniformity.
- Error Reduction: Minimize copy-paste mistakes and improve the accuracy of your models.
A library is essentially a reusable model component stored for future use. Think of them as subgraphs on steroids. You can create a library from scratch. Or you can create one from a graph you’ve already built and apply it across various models as needed. Using a library enhances efficiency and ensures any updates made in a single place are are reflected in all models that link to it.
Next, we’ll show you how to create and implement your own library.
Creating a library
Imagine you created a graph with a node personal_information, that has some questions in it for the end user. Now suppose, for the sake of this example, that you need these questions in a lot of models and are tired of creating them in each model every time. So, you decide to make a library of it.

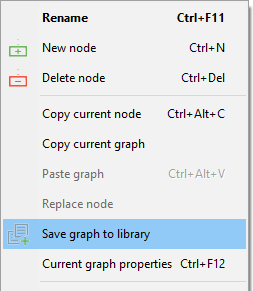
Creating the actual library is really easy! Just right-click somewhere in the graph menu and select Save graph to library.
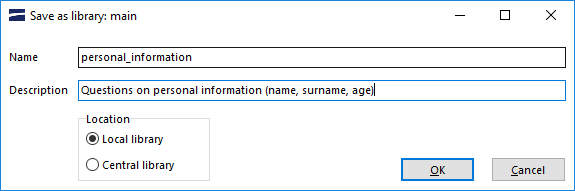
You will be presented with the screen shown below. For now, select Local library - we will explain the difference later. Select [OK], after which you will be asked to replace graph calls with library calls. This is only relevant if the model you use already uses the graph you are turning into a library. In most cases, Yes is the best option.
That’s it! You just created your very own library. In the next section, we’ll discuss how to use it, and in the last section we’ll explain the difference between local and central libraries.
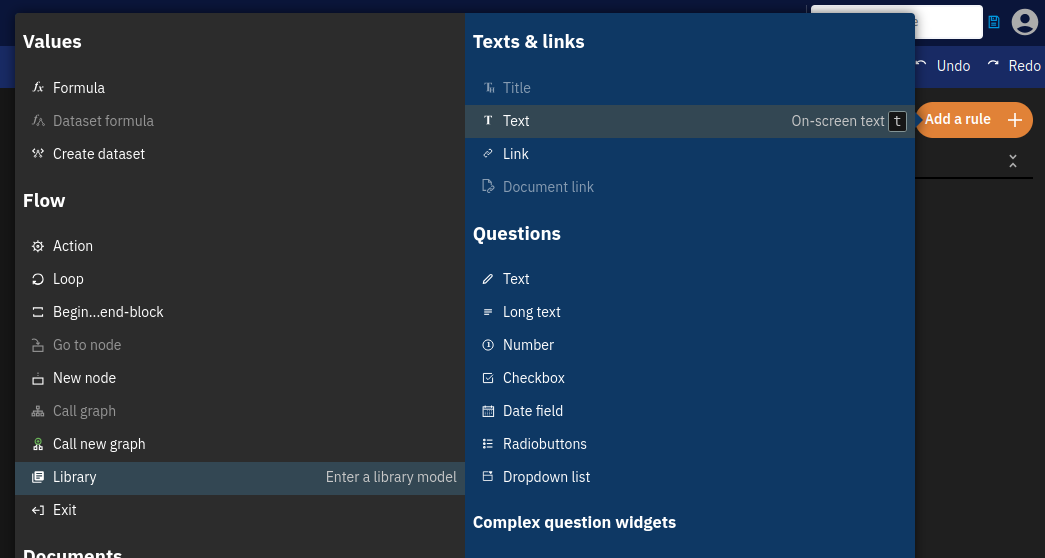
Including a library
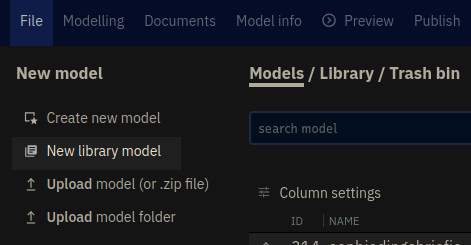
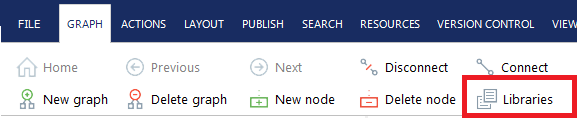
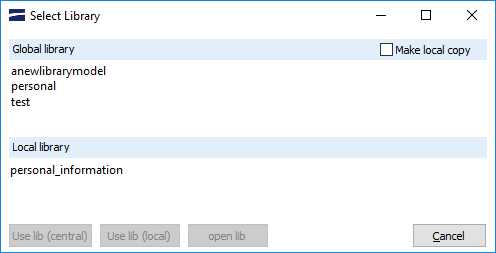
Inside a model you can find the button to include a library under [Graph > Libraries]. This will open up a screen with all central and local libraries.
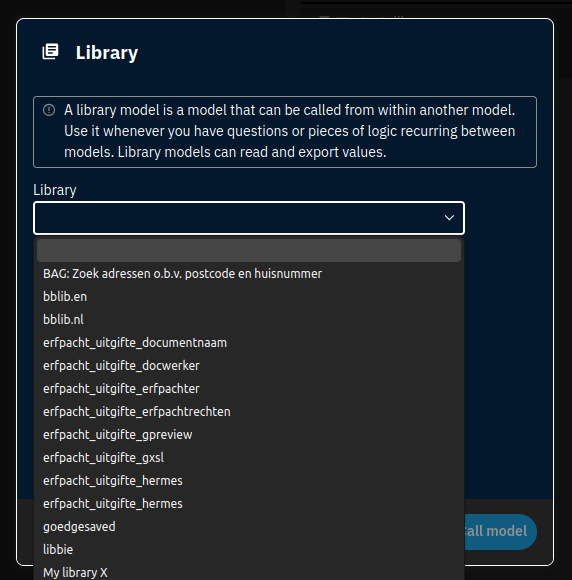
In the ensuing dialog, you can select the library to use. For now, select the personal_information library you just created.
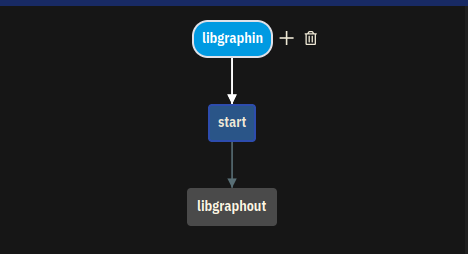
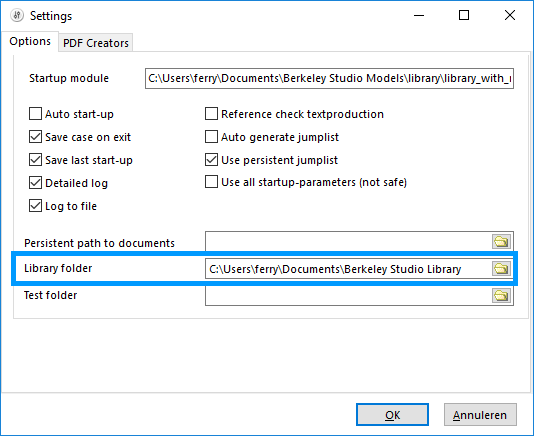
Now you’ll see a library node added to your model with a green ribbon on it. You can now run the model and check whether everything works alright! To do so, the data inspector is quite useful. Furthermore, make sure that your library settings are set to the correct folder:
Now, every time you change the library model, the changes will also happen in any model that uses the library. This saves you a lot of time and you can quickly change numbers and add questions without having to change all models!

Inputs and outputs of a library
A library and a model communicate via the nodes libgraphin and libgraphout. These, as we have seen, are automatically made when you create a library.
Input
The node libgraphin is used to pass values from a model to the library. Variable
values from the calling node can be retrieved within the libgraphin node using
getvaluefromcallingnode('<variable>'). If the library already has those formulas in
place, corresponding variables will be created in the calling model on adding a library
call.
Output
Put any values you want to export from the library inside the node libgraphout. The model invoking the library can retrieve individual values by using getvaluefromlib('<variable>') after the call to the library, and before calling another library.
The calling model can also create a sparse dataset with all the variables from the libgraphout node using the libtodataset('<library>') dataset function. This dataset will contain all calls to the library in question.
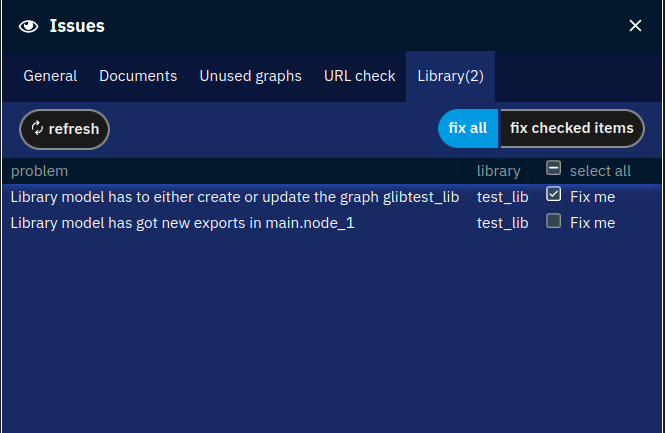
Use the Analysis tool to automate imports and exports
The issue finder under Analysis > Library can help synchronising a model and a library:
Missing variables for getvaluefromcallingnode() formulas in libgraphin will show e.g. as “Library model has got new imports in main.node_1”.
New exports in libgraphout show as “Library model has got new exports in main.callin_a_lib”.
The dataset structure updates for libtodataset() show e.g. as “Library model has to either create or update the graph glibmy_special_lib”.
Local libraries
By default, libraries work ‘globally’, meaning:
- Other authors may use and improve your library, at least when the chosen global library location is a central server.
- The library may be accessed from multiple models, enabling code-reuse, as described earlier.
In the Desktop version of Expertsystemen, a global library can also be converted into a model-local one. This model-local one will overrule global libraries of the same name.
This may be beneficial, in some occasions, but has a few major downsides. One is that code-reuse is out of the question. In most cases, defining proper inputs in libgraphin for a global library can accomplish the same thing. And in general, the distinction between local and global libraries just proved confusing, leading to multiple instances of the same libraries scattered about.
Considering these downsides, in the web version of Expertsystemen, only global libraries can be created, involving zero set-up.
Any local libraries uploaded or published to the online version of Expertsystemen will get converted to a global library, namespaced by the model name. We advise turning local libraries into global ones before migrating your models to the web version in case you want control over the final naming.
NOTE For Desktop users: If you are using the Desktop version and are interested in setting up your own library folder on a server, please contact xxllnc for more information.
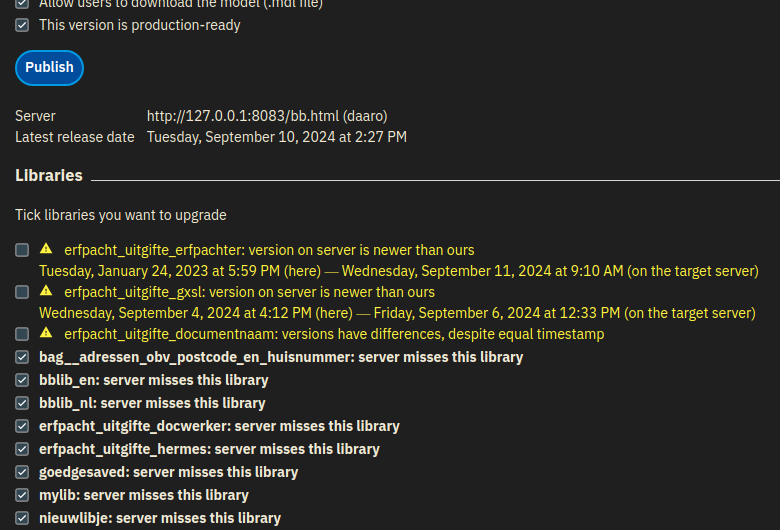
Publishing libraries
Global libraries can be published either invidually or with a model. Model-local libraries are always published along with the model.
On the desktop version of Expertsystemen, publishing required global libraries is not a part of the regular publishing process. You can however select File > Server Publish to explictly publish those libraries to a server.